How to create a flowchart with SimpleMind Pro
Because SimpleMind is a very visual tool, many use it to make flowcharts. We at SimpleMind breathe mind mapping, flowcharting is not really what SimpleMind is designed for. However, we do have some helpful tools and templates that help you create your flowcharts quickly.
The easiest way is to simply use the template “Flowchart” and adjust this. That will give you a great start for most flowcharts. At the end of this page I have added some more stylesheets that you can use when flowcharting.
In the steps below I will describe how you can make your own custom flowchart from scratch. It is a bit of a read, but once you know this – you’ll be making flowcharts in a flash.
Step 1 – Getting started creating a flowchart
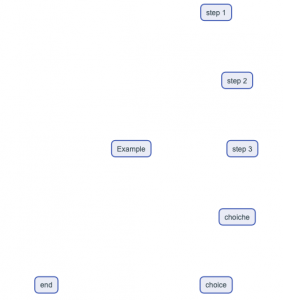
Create a new blank mind map and select the stylesheet “Chart”. This stylesheet “chart” is optimised for flowcharts. Turn on brainstorm mode and start typing topics. It doesn’t have to be complete, you can add more later.
Mac en Windows: Click the brainstorm button from the toolbar.
iPad&iPhone and Android: Select “Brainstorm” from the menu.
Step 2 – Move topics and connect them
Move the topics where you want, simply drag and drop. Don’t worry too much about exact placement and neat lines yet, focus on content first. Need to add more topics? Use the brainstorm bar.
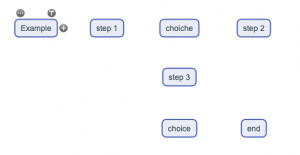
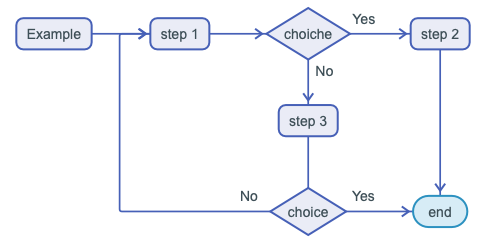
Connect the topics by dragging the + icon onto any other topic. This creates a crosslink.
In the image above the relation between “choice” and “step” is not completely visible. To fix this, click the relation line, hold and drag it. Do not perfect the lines yet, first focus on content.
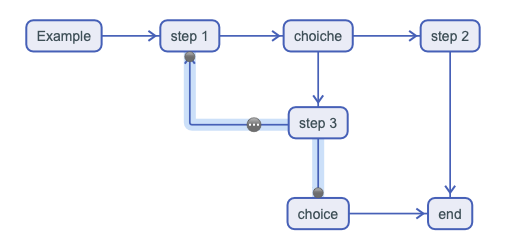
Step 3 – Modify topic shapes and add conditions.
Flowcharts use special shapes to represent different types of actions or steps in a process. For example, a diamond represents a decision. You can easily select a different topic shape via the Style panel.
A decision means you’ll need to add conditions, for example “yes” and “no”, or “blue” and “red”. You can do this by adding labels. Click once once on the relation, use the relation toolbar and select the “add label” icon ![]() and add your text. The labels can be dragged like topics and can be adjusted via Style.
and add your text. The labels can be dragged like topics and can be adjusted via Style.

Step 4 – Review content
Take a step back and review. Is the content complete? Do the steps make sense?
Only when it is complete, start the next step.
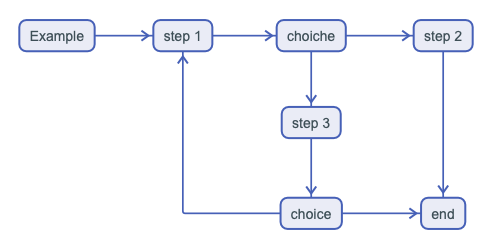
Step 5 – Style the flowchart
Align the topics. To align the topics more easily, go to Preferences – Snap Options and check “center vertical” and “center vertical”.
Mac or Windows: Select from the main menu “SimpleMind” → “Preferences”.
iPad/iPhone and Android: Select “Preferences” from the drop down/ overflow menu.
If needed, long press the relation to adjust its path to make it stand out more (or less). And use Style where needed to draw attention to a specific topic or relation.
Don’t forget, using copy/paste style or style presets makes this a lot easier. Read more about that here.
Examples and templates
Click the image to download the mindmap. The stylesheet will be added to your stylesheets once you’ve opened the mind map.
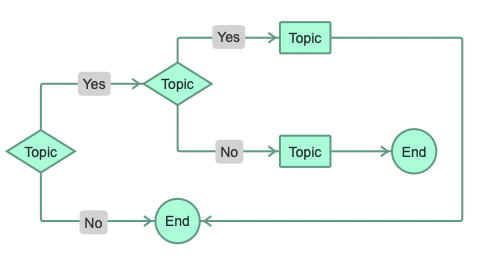
The grey labels are placed on top of the line that connect the topics.
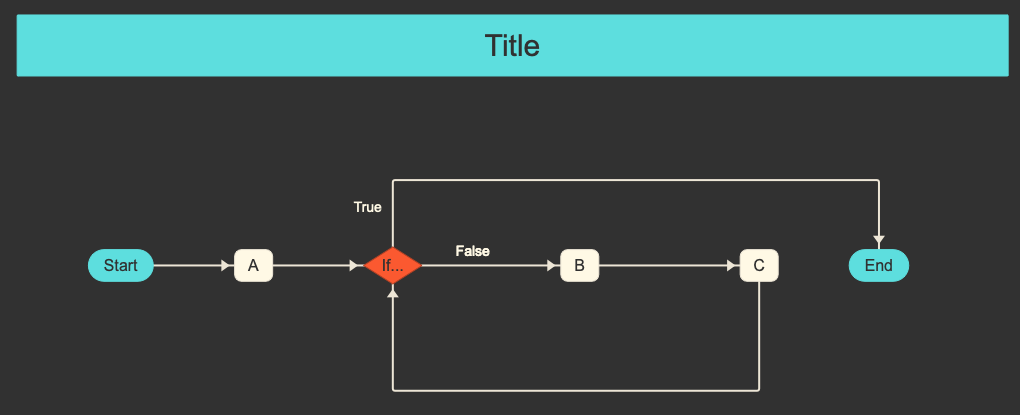
This flowchart has a title with fixed width. You can set this via Style.

This flowchart is by default black and white. The colors have been added via Style to make clear what person (or department) is responsible for what task.